Theme editing
Your website has some content in it that is specific to your new FedComp template. Think of these items as global settings that can appear in multiple locations of your website. Some of the additional content is not editable through the normal Pages or Posts methods.
- To access these Settings, login to the Admin Panel of your WordPress installation.
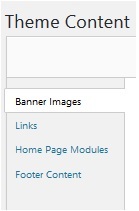
- From there, in the left sidebar, chose “Appearance > Theme Content”.
- Once there, you can see the following options:
- Banner Images: Your Homepage slideshow/banner. Where you go to change the images on that site, and change the duration of time that the slides are up.
- Links: Where you can update the links to your Social Media
- Home Page Modules: This is where you can edit options/information on the homepage, that doesn’t appear in the homepage under Pages.
- Footer Content: Where you can update the information that appears in the footer of your site.
Banner Images
The banner images is where you can go to change the images that appear in the rotating slideshow, on your website. It is broken into two sections: Home Banner Images and Image Pause (in seconds).
Updating your Homepage Images
After any change to the slideshow images, be sure to scroll to the bottom and select “Save Changes”. When you select on the Banner Images, you will see a list of Images that are currently running in your slideshow. At the end of each image, there are two choices, an icon of a pencil that is used to edit the slideshow, and an icon of a trashcan used to delete the slide from the rotation. You can also hover over one of those slides, and your cursor should turn into the “move” cursor: .
This shows you that these slides can be dragged and dropped to change the order.

Clicking on the edit button will bring up the options for that slide. Each slide has the following options associated with it:
- Title: The title of the slide
- Image: The image that appears in the slide. To change the Image, you can hit the plus (+) icon, or you can first remove the old image by pressing the minus (-) icon, and then pressing the plus (+) button.
- Once you have placed the plus (+) icon, it will bring up a model for selecting an image. At the top, there are two tabs labeled “Upload Files” and “Media Library”. You can select the “Media Library” Tab to have access to all the photos currently loaded into your system, through the Media Browser.

- To use the pre-sized banner images provided by FedComp, on the left side select the “Banners” folder under the “Media Library” folder. You can then select which image you would prefer, and then the “Set Image” option to select it.
- Once you are done, be sure to scroll to the bottom of the page, and select “Save Changes” to make sure the settings will be changed. Reload your homepage, and you should now see your newly chosen image in the slideshow rotation.
- Banner Link URL (Optional): this is an optional field, where you can place in a URL to make the slide clickable. The best method to make sure that you are getting the correct URL, is to copy and paste the target URL from a new tab, into this field.
- Banner Link Target: Allows you to chose to have your optional link open in a new tab or open in the same window.